The Completely Frictionless Way to Let Guests Use Home Assistant
Why Guests Hate Home Assistant
I often have family and friends over at my place, and almost every time they ask “How do I turn on the light?” or “What was the Home Assistant login again?” It’s always a pain for them to have to take the time to find the Home Assistant url and then log in with the guest credentials.
In the past, I’ve just printed the guest username and password and posted it on the fridge, but now I think I’ve finally found a way to help ease the pain (and encourage my guests to use the guest dashboard in HA that I put so much work into).
With the setup I’ll explain in this post, my guests can now simply scan a QR code and immediately have access to the guest account on my Home Assistant instance.

Updated: Install the Add-On
Back when I first published this post, I’d only hacked all this together so that I could reduce the friction for my guests to use Home Assistant. I didn’t expect it to be such a popular topic for other Home Assistant users. So, in the spirit of further reducing friction, I’ve wrapped this up in a nice, convenient Add-On. Now, it’s completely painless to get this running in your own house.
You can get started by clicking the following button. Or, for more information, check out the project README on github.

Also, while it’s not completely necessary for setting up the add-on, I encourage you to read the rest of the post to better understand how the add-on works under the hood as well as to get some more ideas for making your smart home better for guests.
If you like this project, please be sure to give it a star on GitHub and share it with other Home Assistant enthusiasts you might know.
Setup and How it Works
The setup to make this work is pretty straightforward. It only requires a web server sitting somewhere on your local network and a QR code printed and placed somewhere convenient for your guests.
The whole sign-in process goes like this:
- The guest scans the QR code
- The guest is redirected to a welcome page on your local network (hosted on your web server)
- Javascript running in the browser on that web page will make a request to the web server for a redirect URL
- The web server uses the guest username and password it has stored locally to start the sign-in process with Home Assistant
- Home Assistant returns a code to the web server and the web server includes that code in a redirect URL it sends to the guest’s browser
- The guest’s browser is redirected to the URL and the code is used to finish authenticating with Home Assistant
- The guest is now signed in to Home Assistant and redirected to the dashboard
The Web Server
To host my web server, I just used a Raspberry PI Zero I already had lying around. The server doesn’t by any means need to be beefy, so almost anything will work. You could even run it on the same machine that hosts your Home Assistant instance.
Getting the code
The code for the project can be found on github. To get started, clone the repo onto the machine you plan to use as the web server.
Following is the complete code for the web server. It uses express to handle both the request for the index.html file and the request for the redirect URL.
import fetch from "node-fetch"
import express from "express"

// Change these to match your setup
const haUrl = "http://homeassistant.local";
const clientId = "http://homeassistant.local/";
const dashboard = "lovelace-guest";
const guestUserName = "username";
const guestPassword = "password";
const port = 80;


function getState() {
  const state = {
    hassUrl: `${haUrl}`,
    clientId: clientId,
  };
  const jsonState = JSON.stringify(state);
  return Buffer.from(jsonState).toString('base64');
}

async function getFlowId() {
  const response = await fetch(`${haUrl}/auth/login_flow`, {
    headers: {
      accept: "*/*",
      "accept-language": "en",
      "content-type": "text/plain;charset=UTF-8",
    },
    body: `{"client_id":"${clientId}","handler":["homeassistant",null],"redirect_uri":"${haUrl}?auth_callback=1"}`,
    method: "POST",
  });

  return (await response.json()).flow_id;
}

async function getCode() {
  const flowId = await getFlowId();
  const response = await fetch(
    `${haUrl}/auth/login_flow/${flowId}`,
    {
      headers: {
        accept: "*/*",
        "accept-language": "en",
        "content-type": "text/plain;charset=UTF-8",
      },
      body: `{"username":"${guestUserName}","password":"${guestPassword}","client_id":"${clientId}"}`,
      method: "POST",
    }
  );
  return (await response.json()).result;
}

function createRedirectUri(code) {
  let uri = `${haUrl}/${encodeURIComponent(dashboard)}?auth_callback=1`;
  uri.includes("?") ? uri.endsWith("&") || (uri += "&") : (uri += "?");
  uri += `code=${encodeURIComponent(code)}`;
  uri += `&state=${encodeURIComponent(getState())}`;
  uri += "&storeToken=true";
  return uri
}

async function getRedirectUri() {
  var code = await getCode();
  var uri = createRedirectUri(code);
  return uri;
}


const app = express()

app.get('/', (req, res) => {
  res.sendFile("index.html", { root: '.' });
})
app.get('/api/getRedirectUri', async (req, res) => {
  res.send(await getRedirectUri())
})

app.listen(port, () => {
  console.log(`Example app listening at http://localhost:${port}`)
})
Running the Web Server
After you clone the repo, you’ll need to install all the dependencies with npm install. Also, be sure to replace the variables in server.js to point at your Home Assistant instance and use the correct guest account credentials.
Note the dashboard variable. You can set this value to point at a dashboard specifically made for your guests. You can also leave it blank to use the default lovelace dashboard, or include links to specific views within a given dashboard.
Once you’ve properly set up the project, you can run the server from your current folder with node .. You may have to use sudo if you’re using port 80.
To test the server, you can open a browser from a different machine on your network and go to http://<webServerIpAddress>:<port>. For my setup, I was able to set the hostname of the Raspberry PI and use a much more memorable url (http://welcome.local).
If everything worked correctly, you should be redirected to the Home Assistant dashboard logged in as your guest user.
A Note on Security
Like I mentioned in the disclaimer at the top of this post, doing this can open you up to security risks, but for my particular setup, I’ve decided the risk is acceptable. Here’s my thought process.
The downside is pretty obvious. By setting up this server, anyone on your network will be able to log into your Home Assistant instance as your guest user. In my opinion, that is ok for two reasons:
- Letting anyone on the network log in is exactly the goal of this project. What we’re trying to replace here is the need to physically write down the guest credentials on a piece of paper and share it publicly in the house.
- If (like me) you don’t use SSL communication locally with Home Assistant, those usernames and passwords are already being sent over your local network in plain text every time you log in anyway. If someone from the outside world were to get access to your network, they could already find those credentials if they were looking for them – maybe this actually works better as an argument in favor using SSL instead of a rationalization of breaking secure best practices.
Bonus Points
After you get the server running, here are some extra pointers for perfecting your setup.
Use systemd to Keep the Server Running
I actually learned about systemd specifically for this project. It’s a great way to manage your server and keep it running. I’ll leave it to the reader to research more about systemd, but here is my setup on my Raspberry PI Zero:
The repo is cloned into /home/pi/welcome_server. Then I created a file called /lib/systemd/system/welcome_server.service with the following contents:
[Unit]
Description=Welcome Server
After=network.target
After=network-online.target

[Service]
WorkingDirectory=/home/pi/welcome_server
ExecStart=/usr/bin/node /home/pi/welcome_server
Restart=on-failure
RestartSec=5s

[Install]
WantedBy=multi-user.target
With this configuration, the server starts when the Raspberry PI boots up, and restarts if the server crashes.
Make a Better Guest Experience
Create a Separate Guest Dashboard
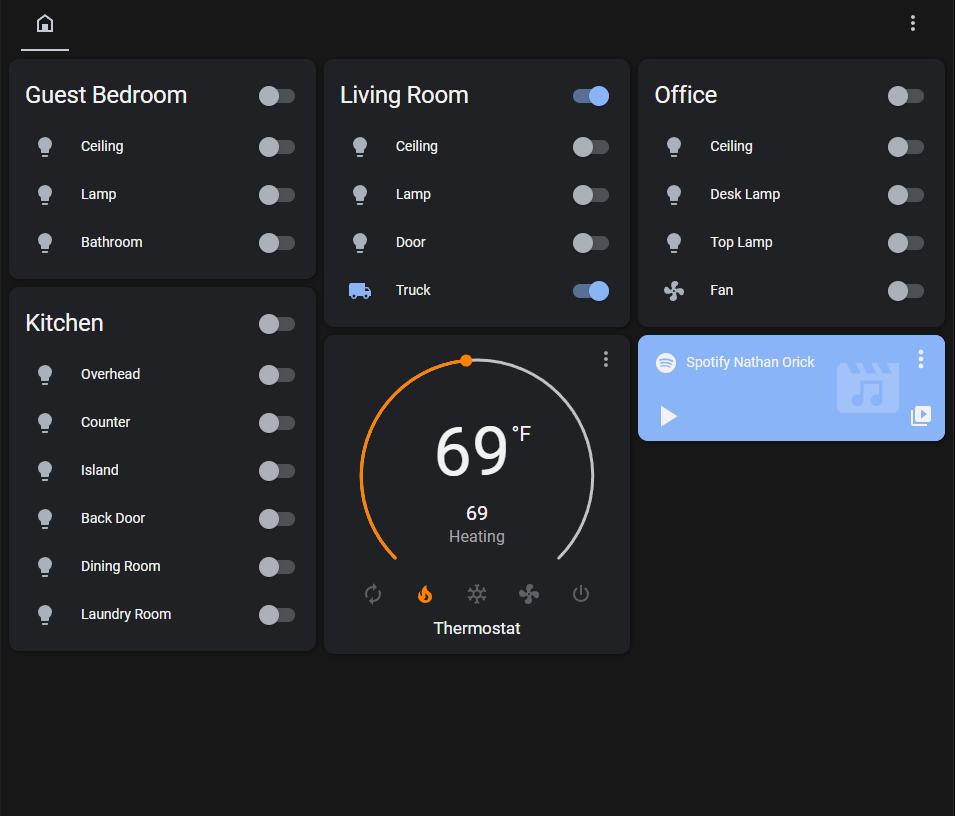
I really wanted to limit what my guests were able to do in Home Assistant. Not just because I didn’t want them messing with all my lights, but also because I didn’t want them to be overwhelmed with all the options my wife and I have gotten used to over time.
To make this easier, I created a separate dashboard for my guests. I named it lovelace-guest. You can do this from /config/lovelace/dashboards.
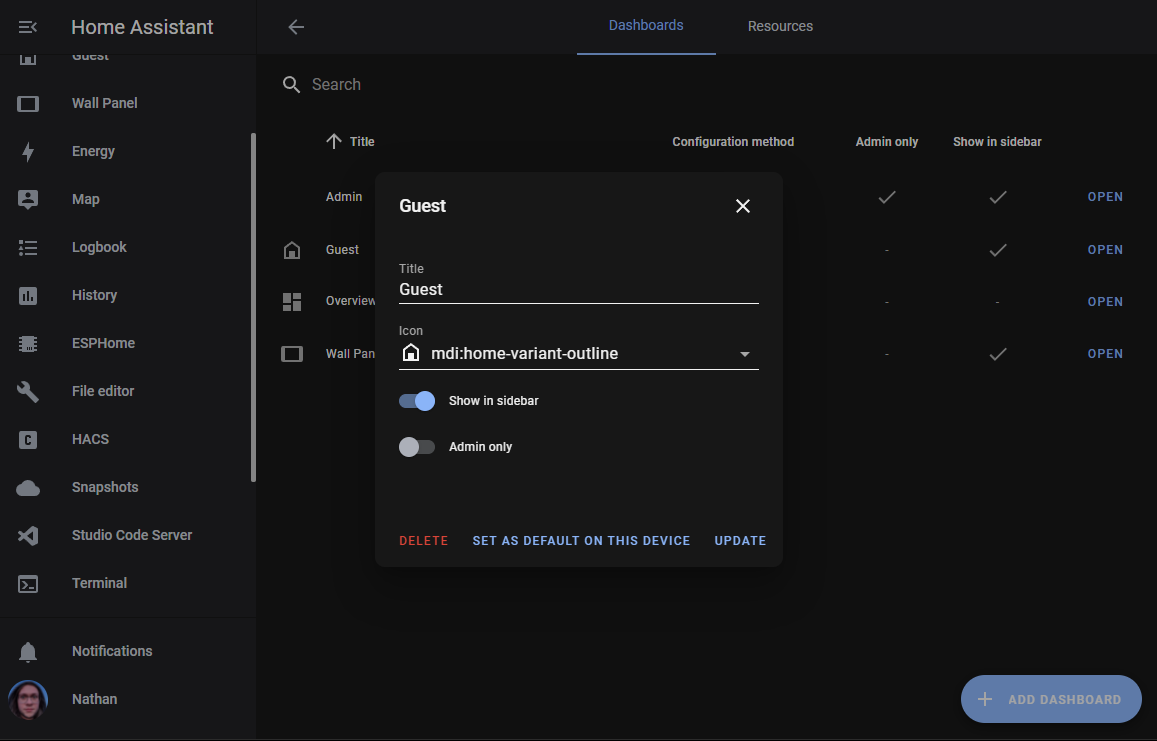
After I created the dashboard, I only added controls for the things I thought my guests would actually need to control and disabled the account’s access to all the other much more complicated dashboards and views.
Create QR Codes
I think it’s really convenient to leave my guests a QR code to scan to access Home Assistant. Even better, if you have access to a 3D printer, it’s really cool to print a 3D QR code that you can leave somewhere convenient like a guest bedroom. I absolutely love QR2STL. You can give the site the link to your ha-guest-auto-login server, and it will create an STL file to 3D print the QR code. It’ll even let you leave a blank space in the middle of the print to place an NFC chip so that guests can just touch it with their phone to be redirected to Home Assistant.
Conclusion
This setup has worked out really well for me and my guests, and I hope it can make your guests a little happier as well. If you have any questions or suggestions, please leave a comment in the comments section below.